Chemical Storage Units are specific physical locations within your lab where chemical containers are stored. Typically, these locations will include flammable cabinets, refrigerators, acid cabinets, and dry chemical cabinets. Chemical Storage Units must be labelled with a physical label to match the name in Chematix. The default "undefined" location will be listed in every lab room in Chematix and cannot be edited or deleted and will be where new hazardous chemicals will be inserted into your Chematix inventory listing. Transfer newly received chemicals (click here for steps) into their appropriate storage location in Chematix.
Follow these steps to create Chemical Storage Units for each of your lab rooms:
-
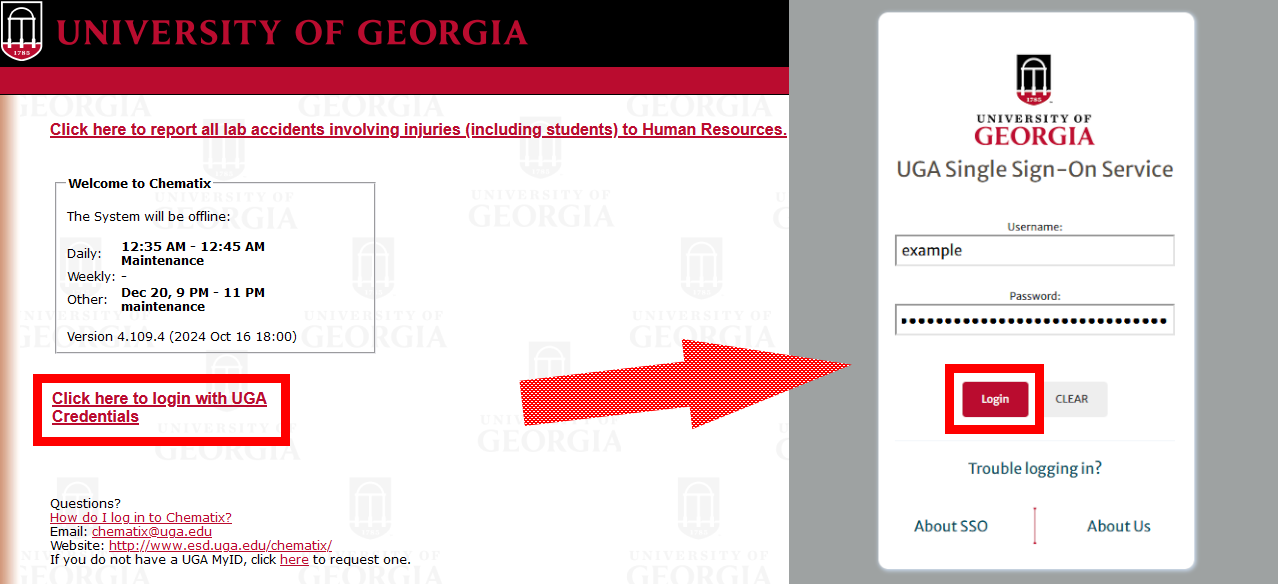
Login to Chematix (https://chematix.uga.edu) using your UGA credentials.
-
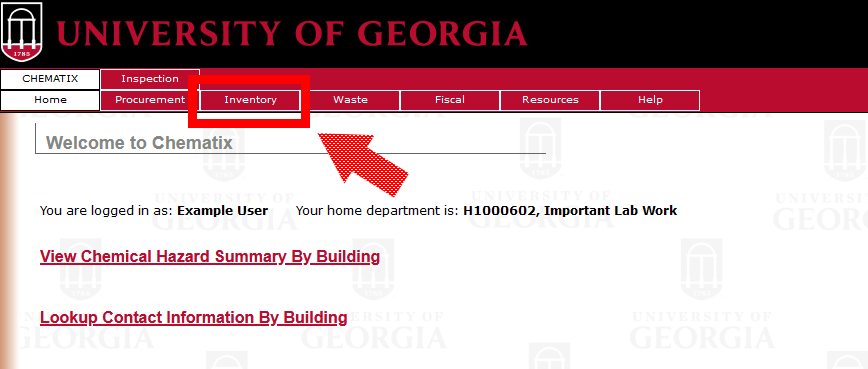
Click the Inventory tab in the top menu.
-
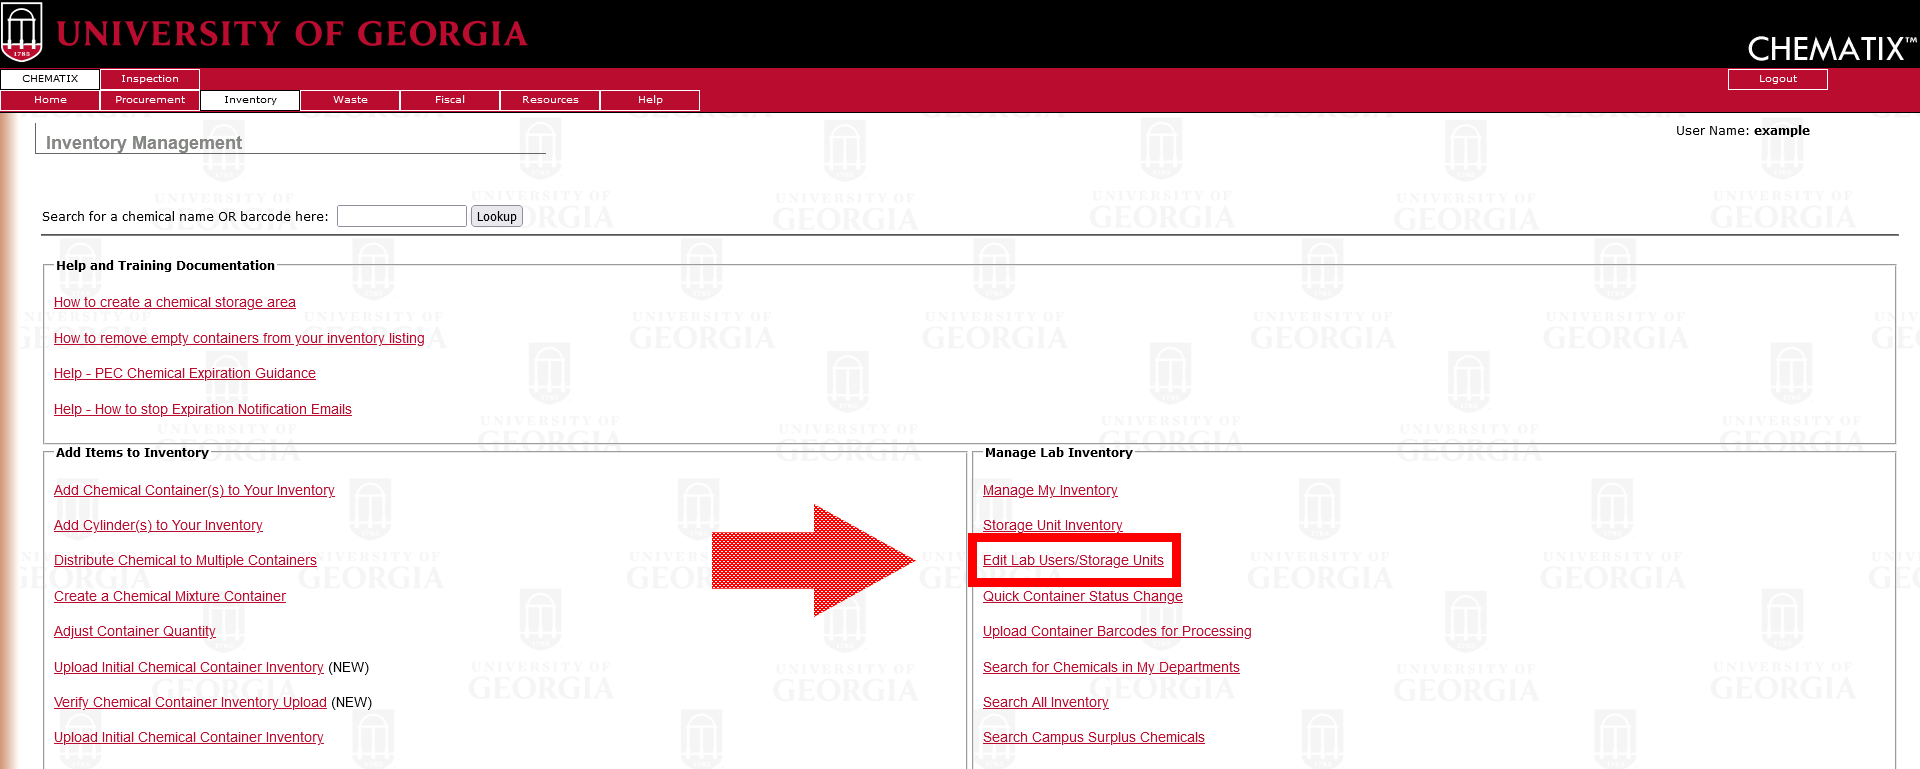
Click 'Edit Lab Users/Storage Units' link in the right hand column.
-
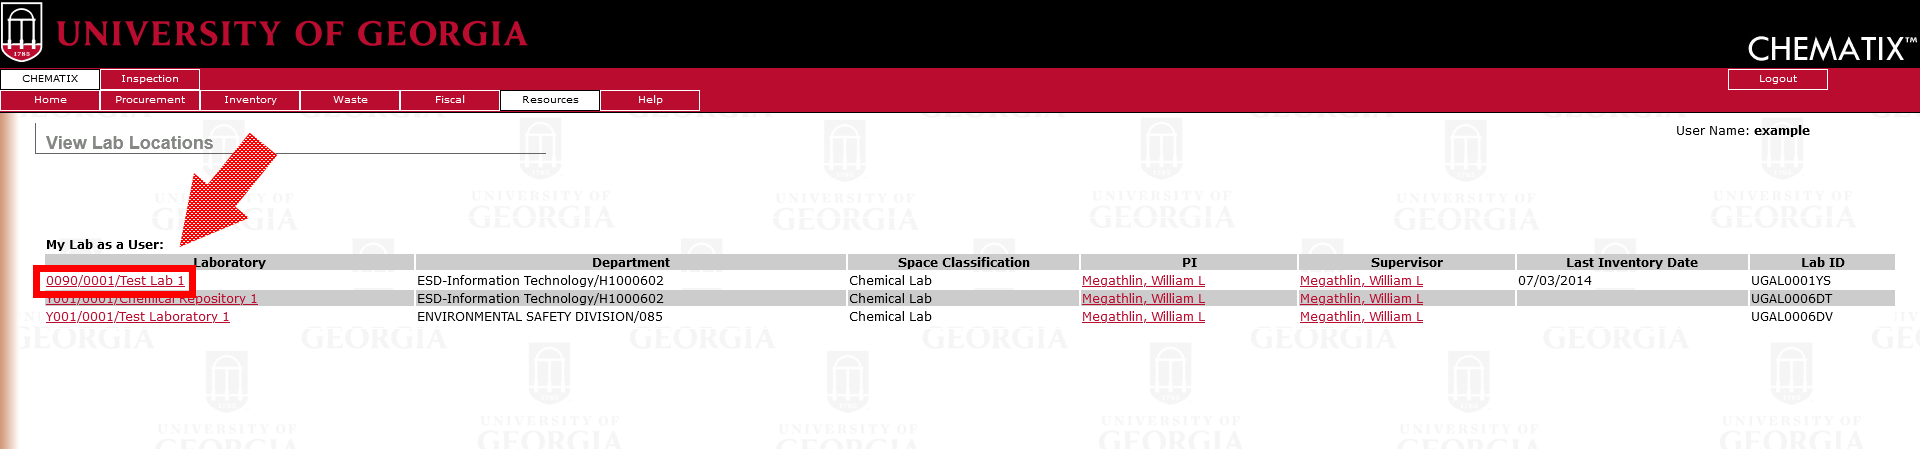
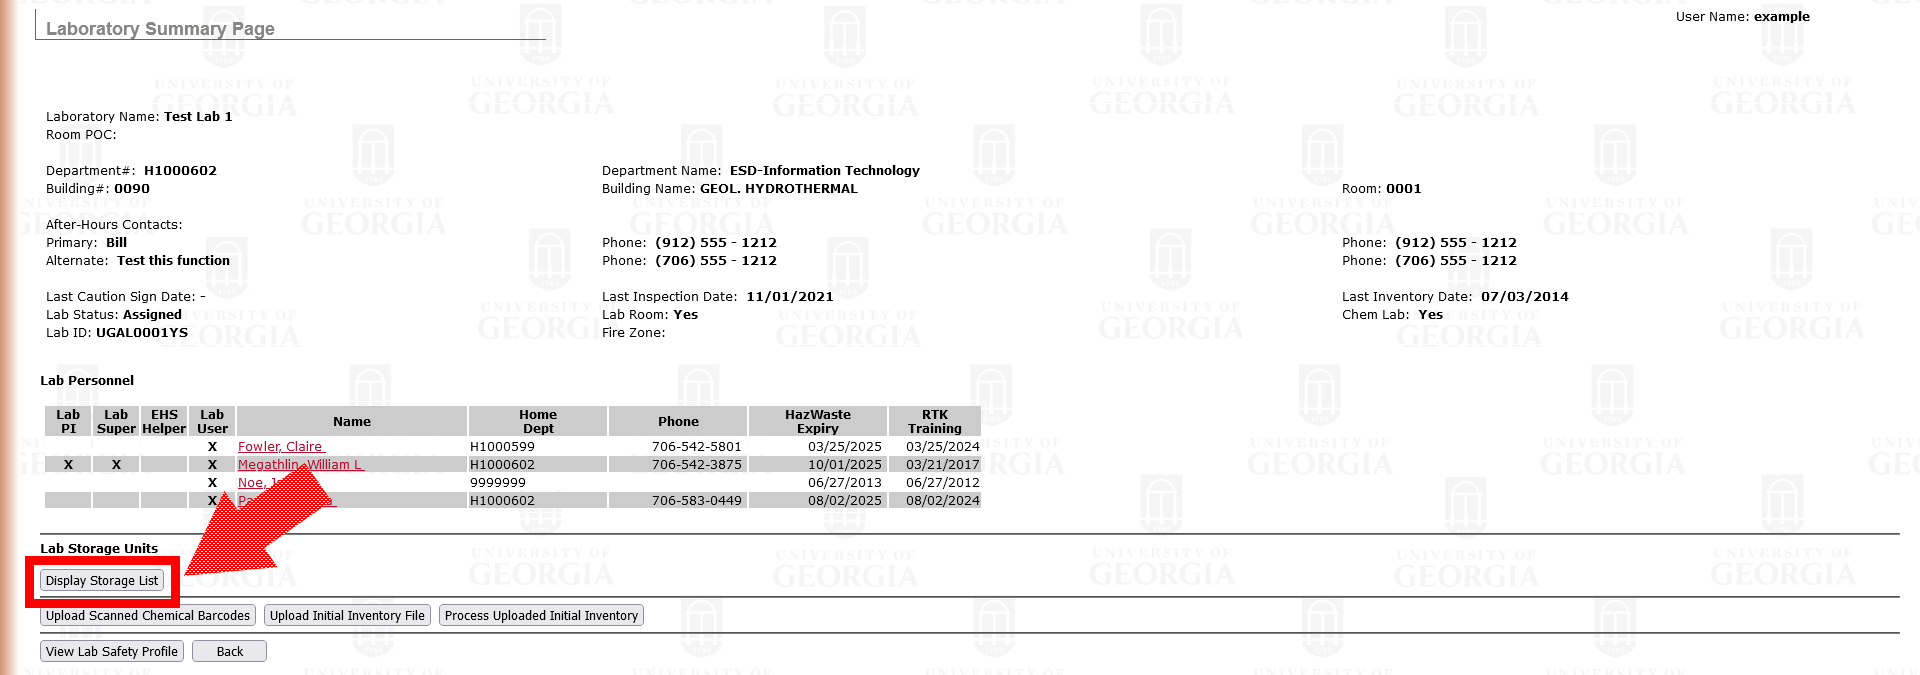
Click the name of your lab from the list shown.
-
Click the button Display Storage List.
-
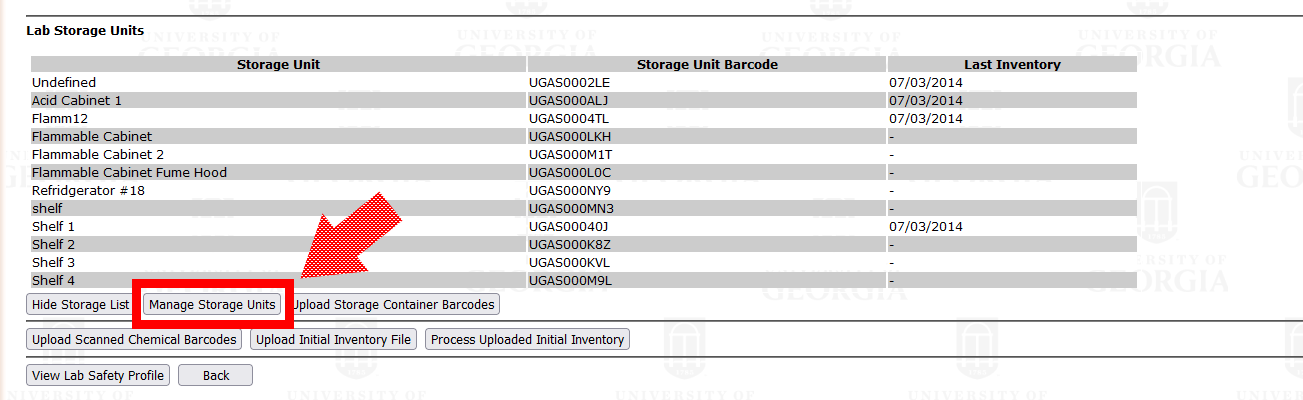
Click the button Manage Storage Units.
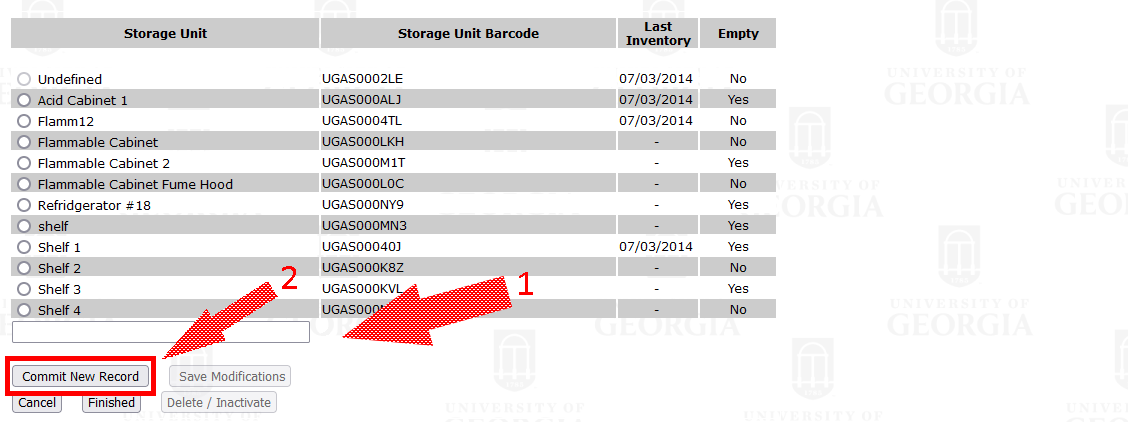
- In the text field provided on the next page, enter the name you've chosen for the storage unit. The name you use is your choice. We ask that you also physically label the storage unit in the lab with the same name you choose to list in Chematix. Common storage unit names include "flammable storage 1," "acid cabinet 2," and "fridge."
-
Click the button Commit New Record.
- Repeat steps 7 and 8 until you have entered all of the storage units for the room you selected.
- Click Finished.


